Front-end deployment
In the first step in this workshop, we will host the web application (front-end) with S3 Static website hosting:
-
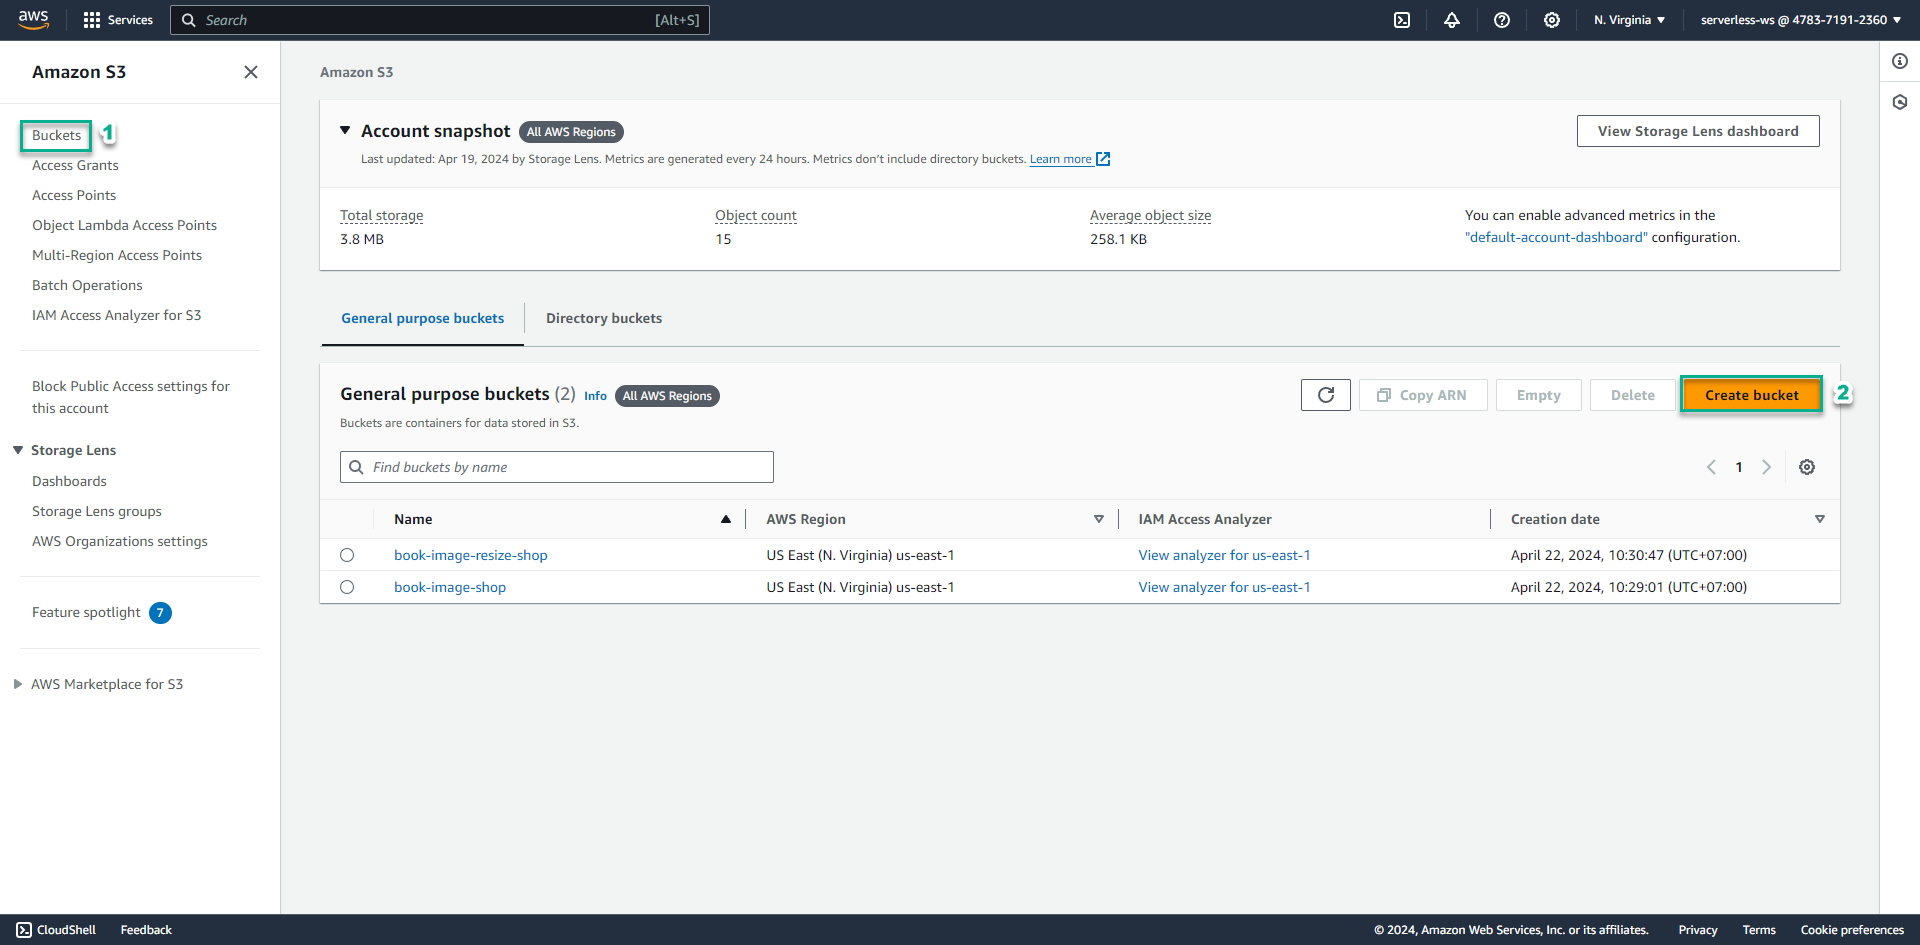
Open Amazon S3 console, then Click Create bucket
-
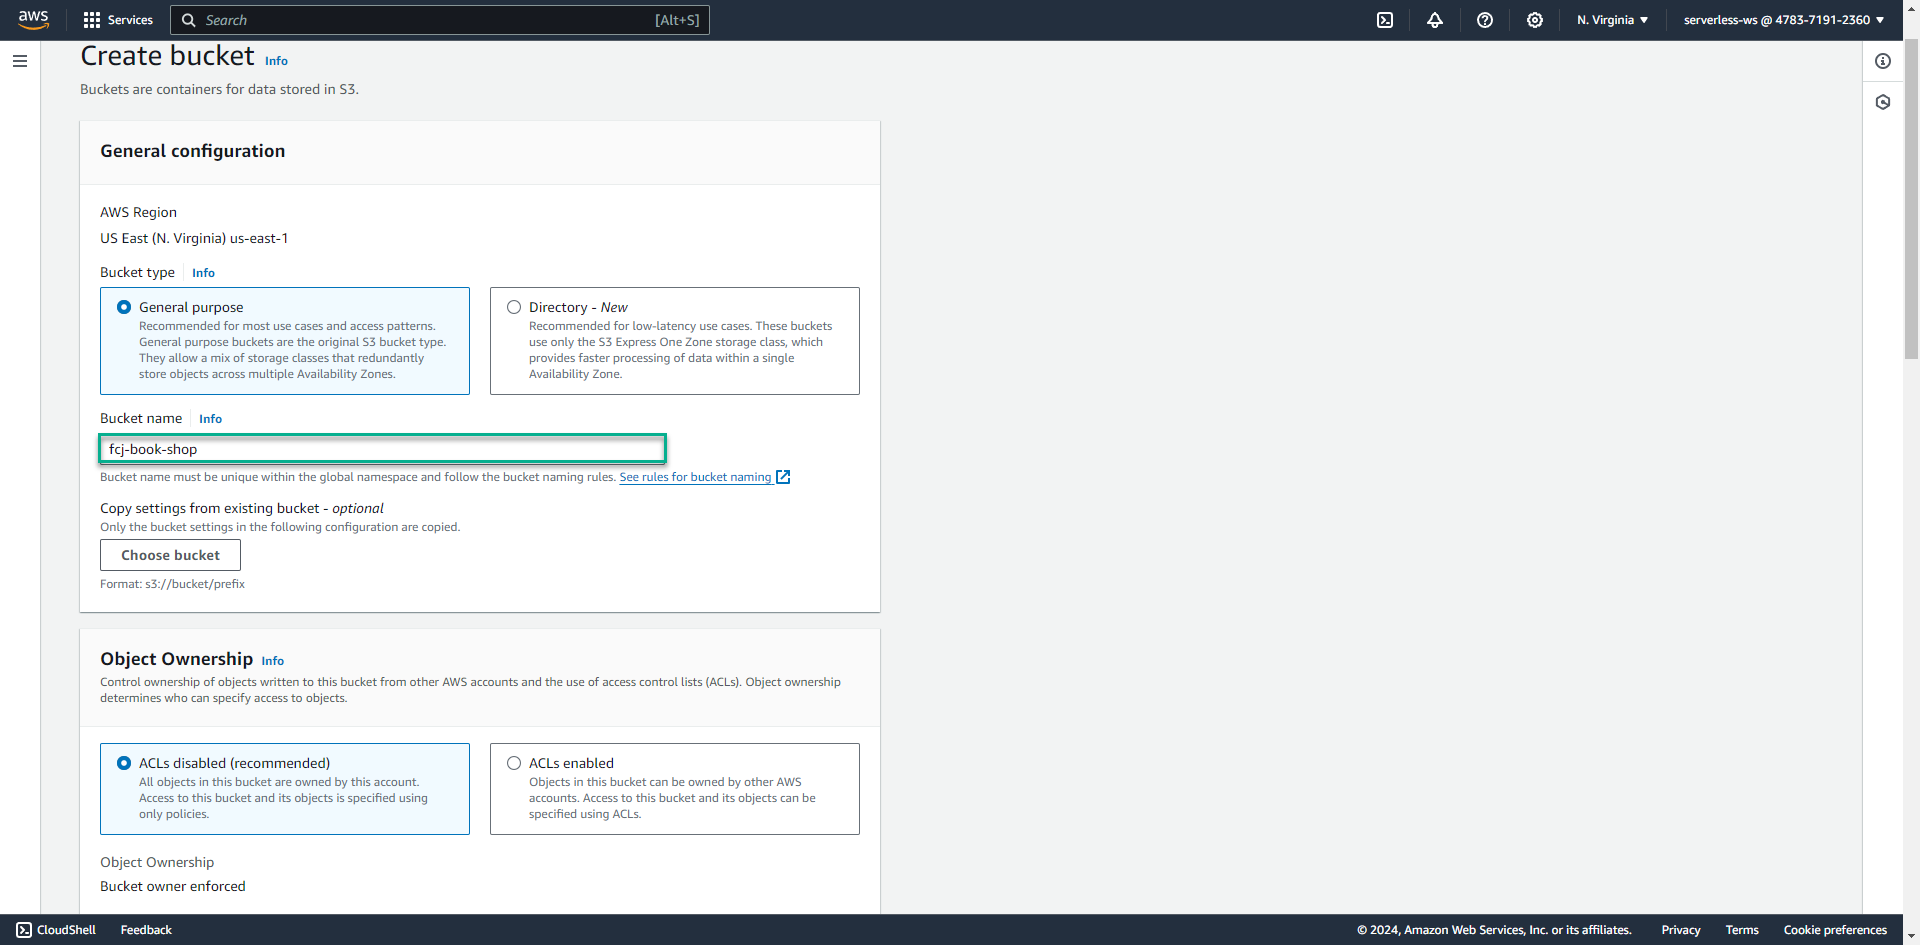
Enter bucket name, such as: fcj-book-shop
- Select the region closest to you
- Select the region closest to you
-
Uncheck block from allowing public access
- Check to I acknowledge that the current settings might result in this bucket and the objects within becoming public
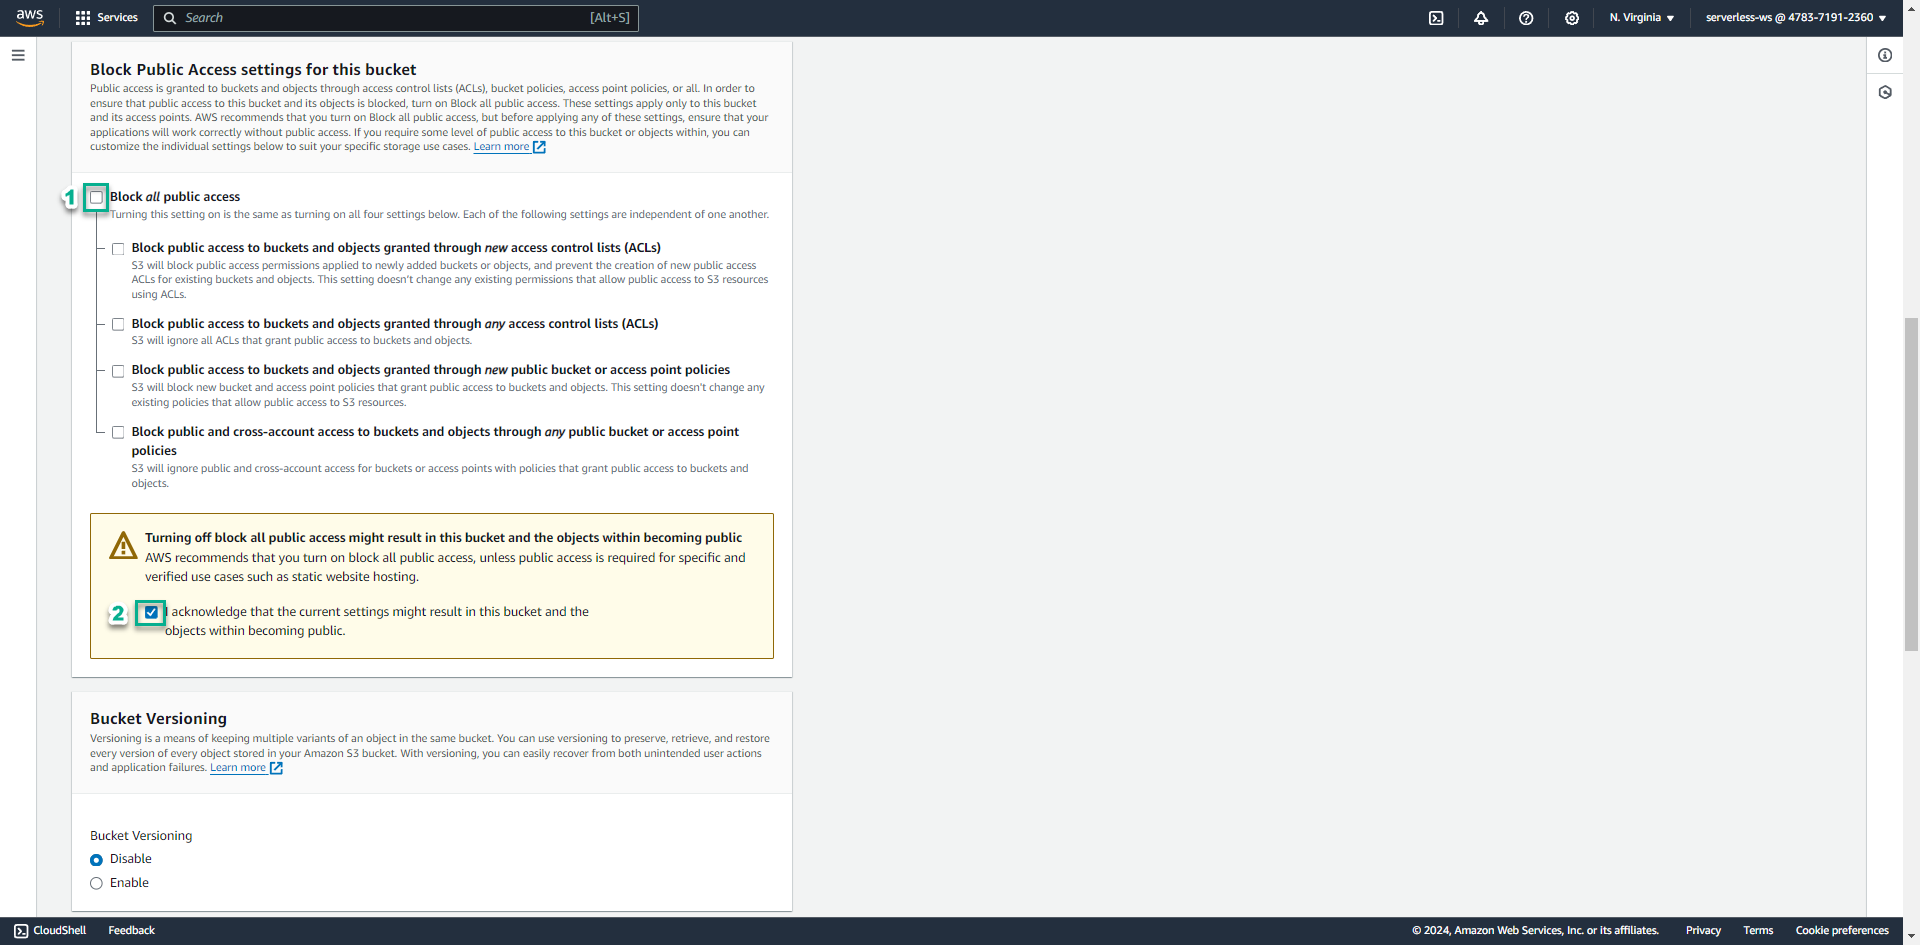
- Check to I acknowledge that the current settings might result in this bucket and the objects within becoming public
-
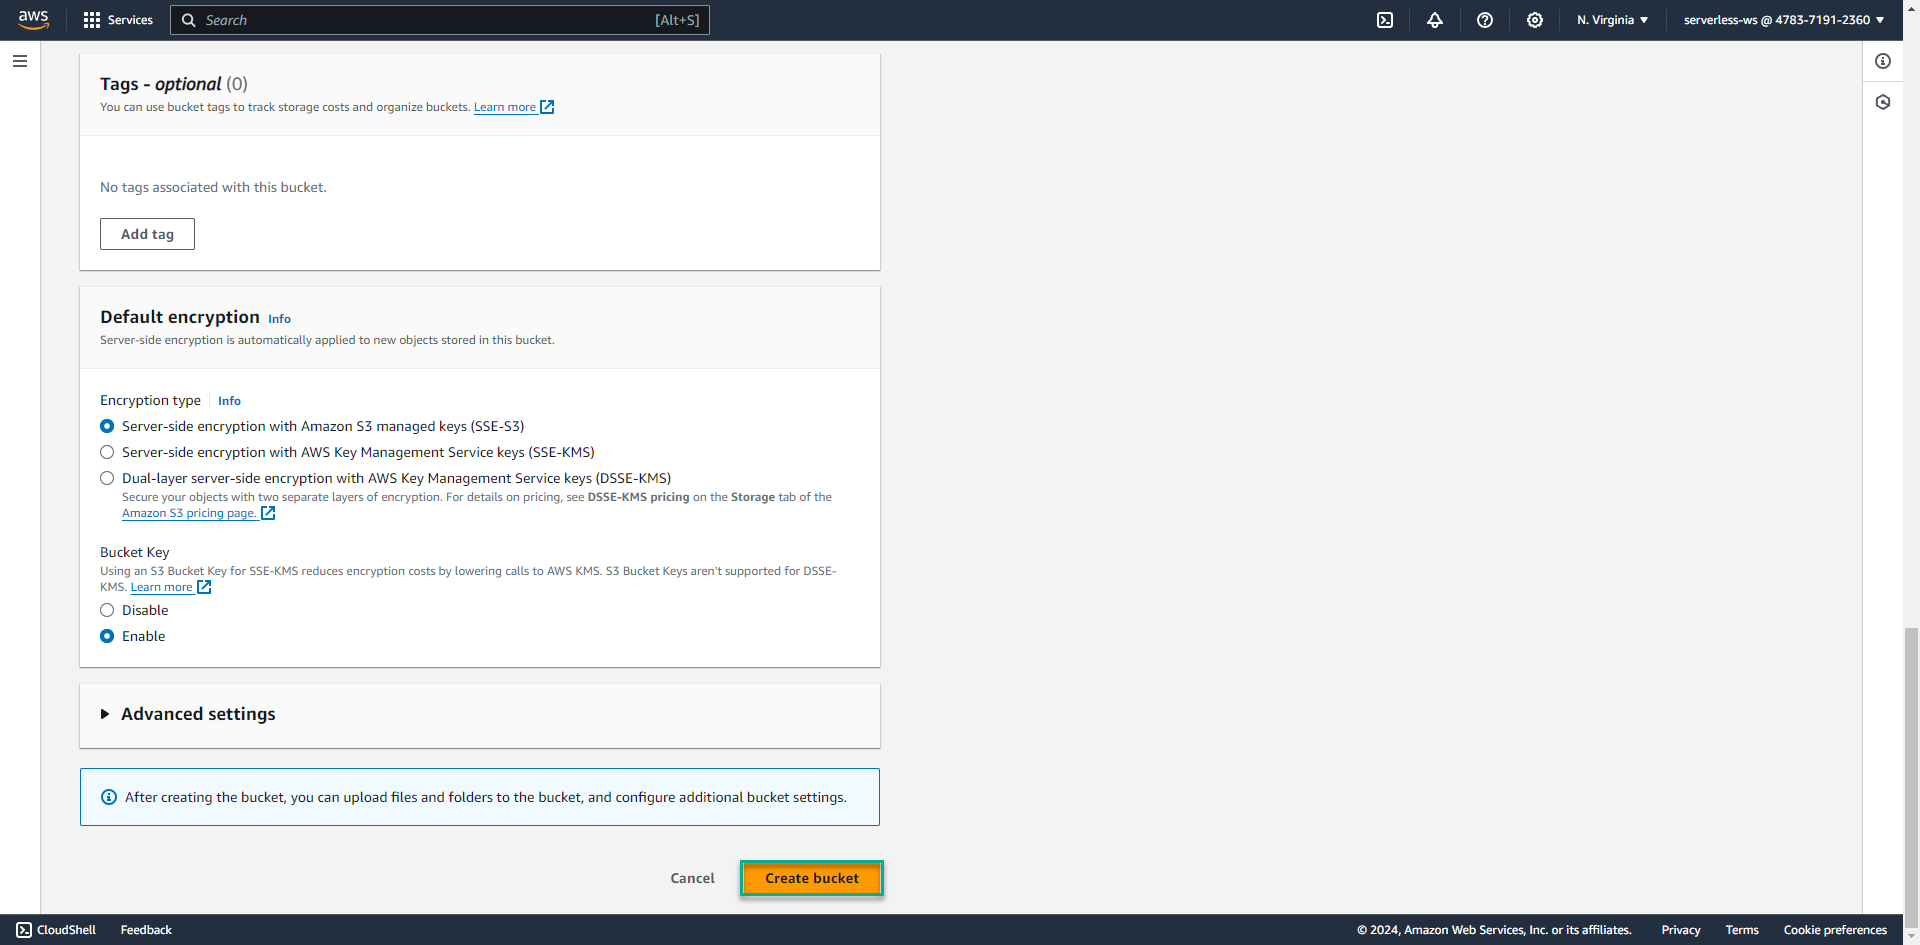
Click Create bucket button
-
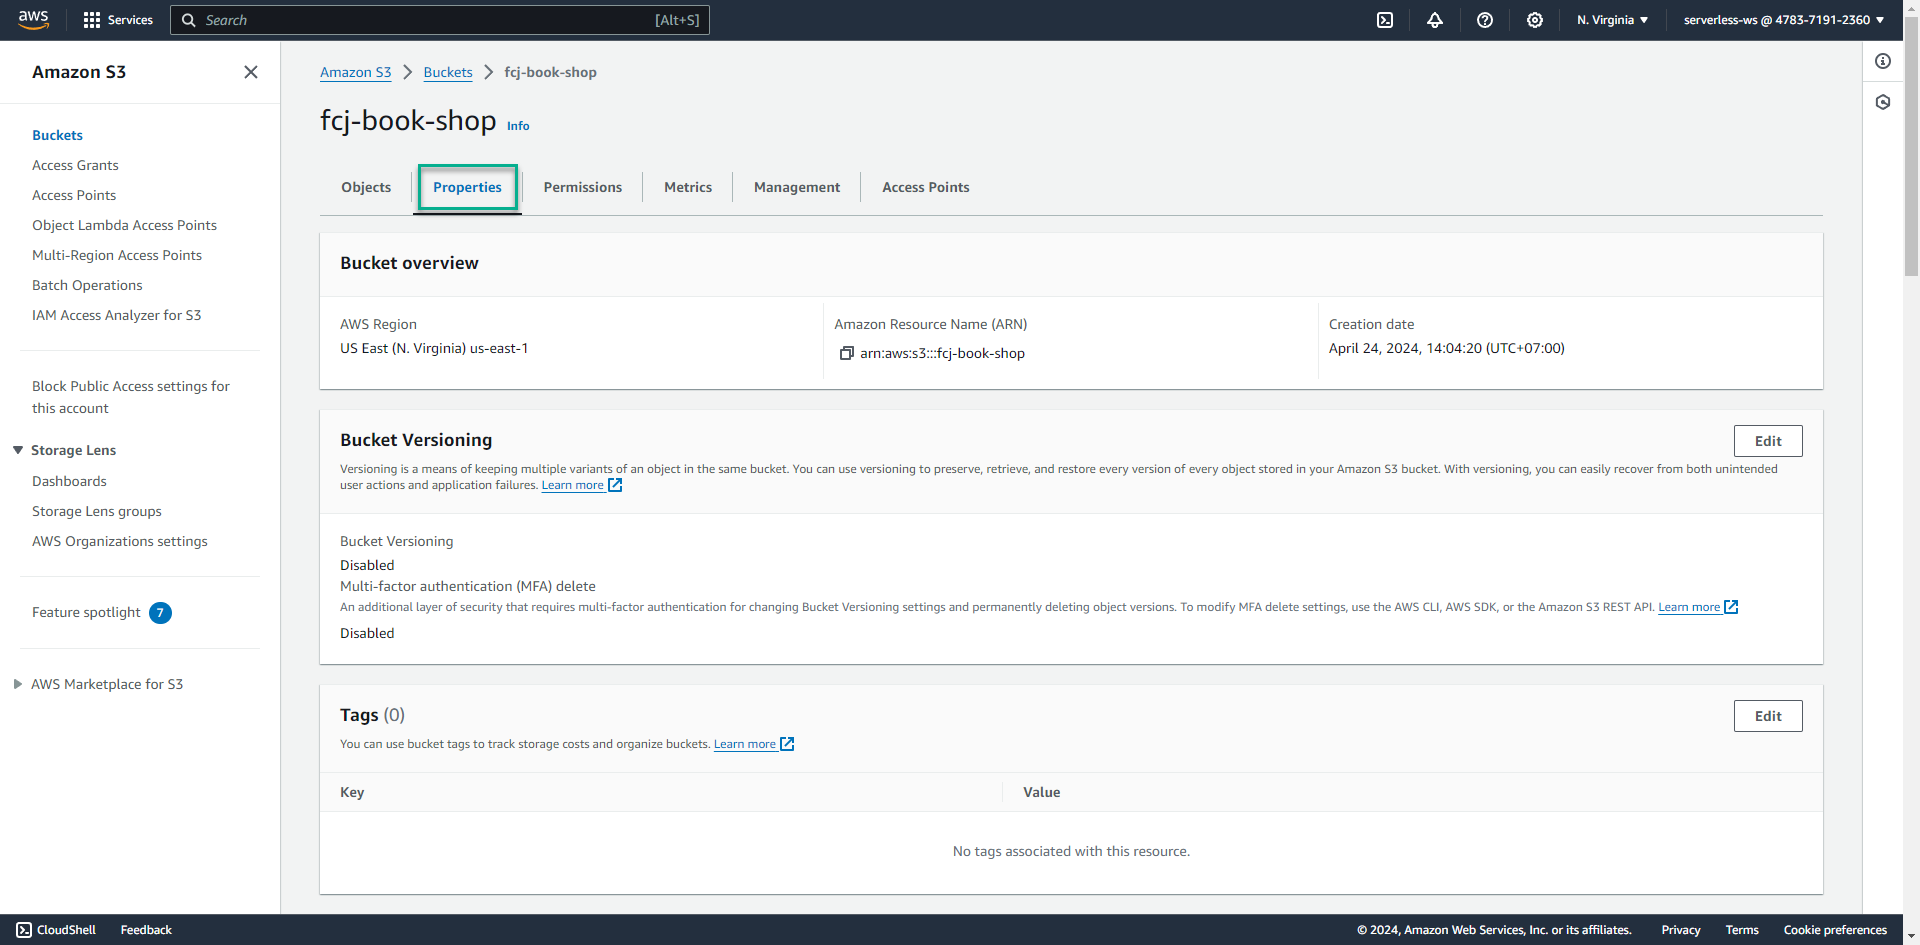
Click on created bucket, click Properties tab
-
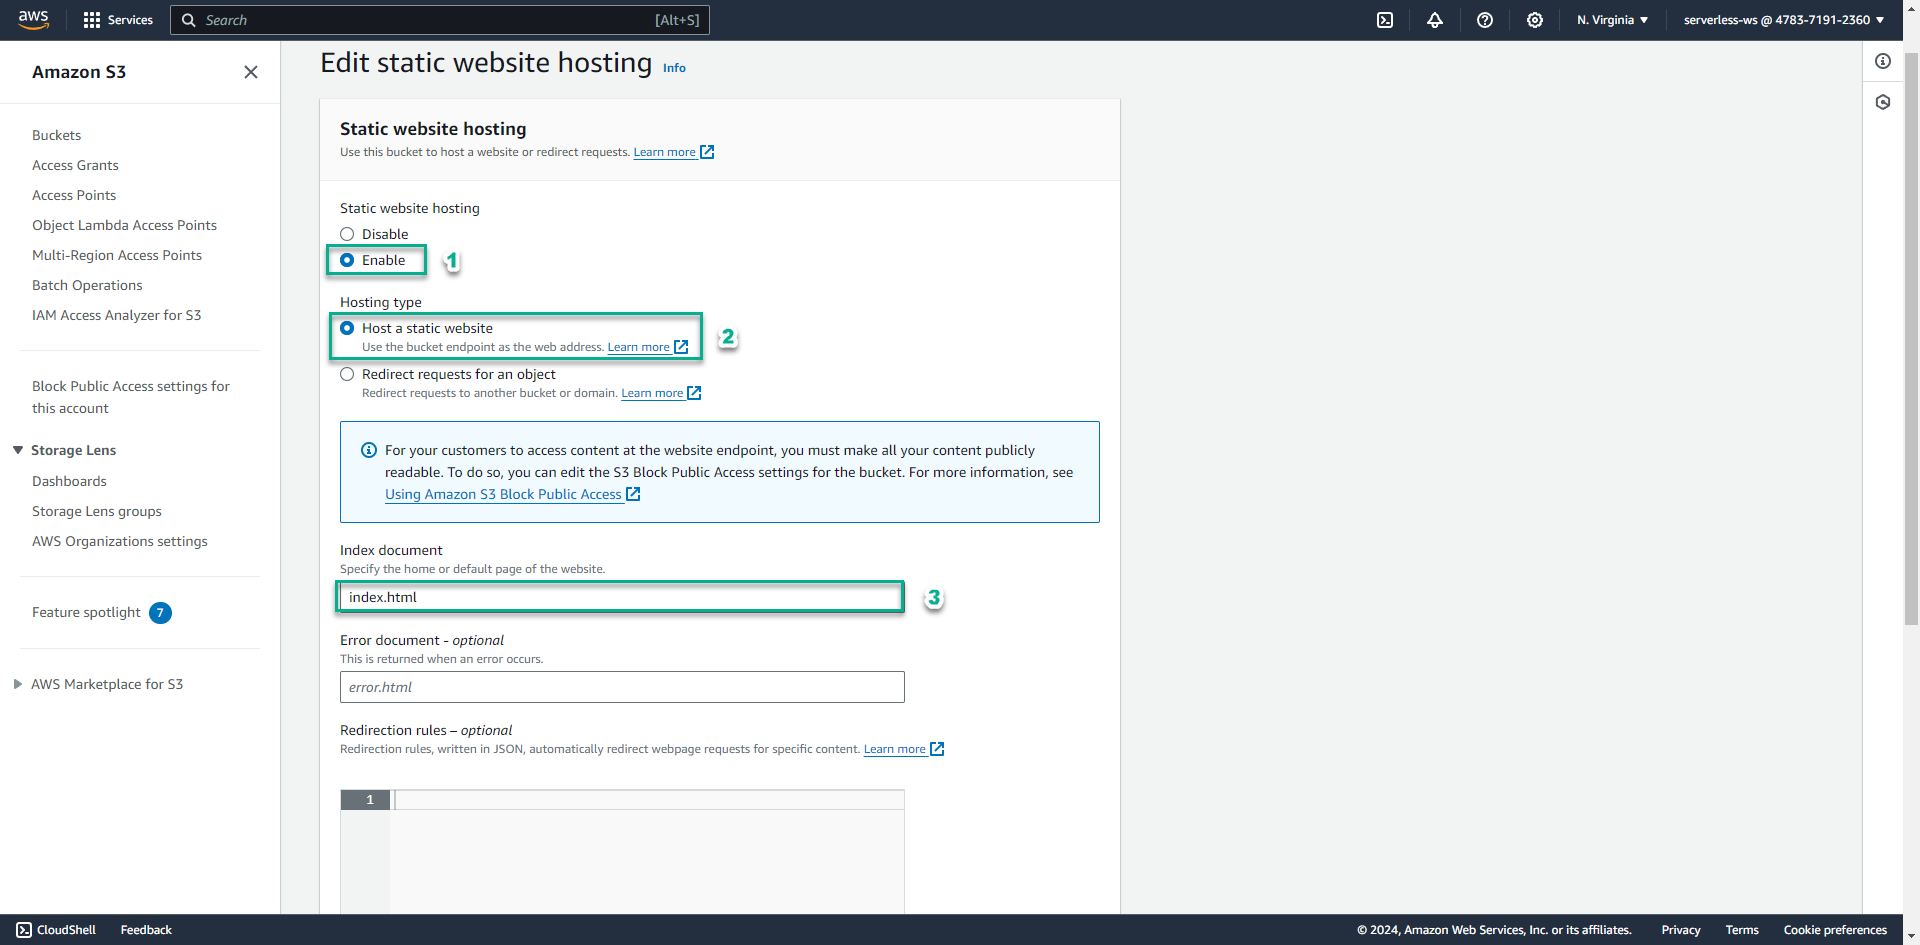
Scroll down to the bottom, click Edit in Static web hosting pattern

-
Select Enable to enable host web static on S3
- Select Host a static website for Hosting type
- Enter index.html for Index document pattern
-
Click Save changes
- After successfully enabling, please write down the path of the web

- After successfully enabling, please write down the path of the web
-
Select Permissions tab
- Click Edit of Bucket policy pattern
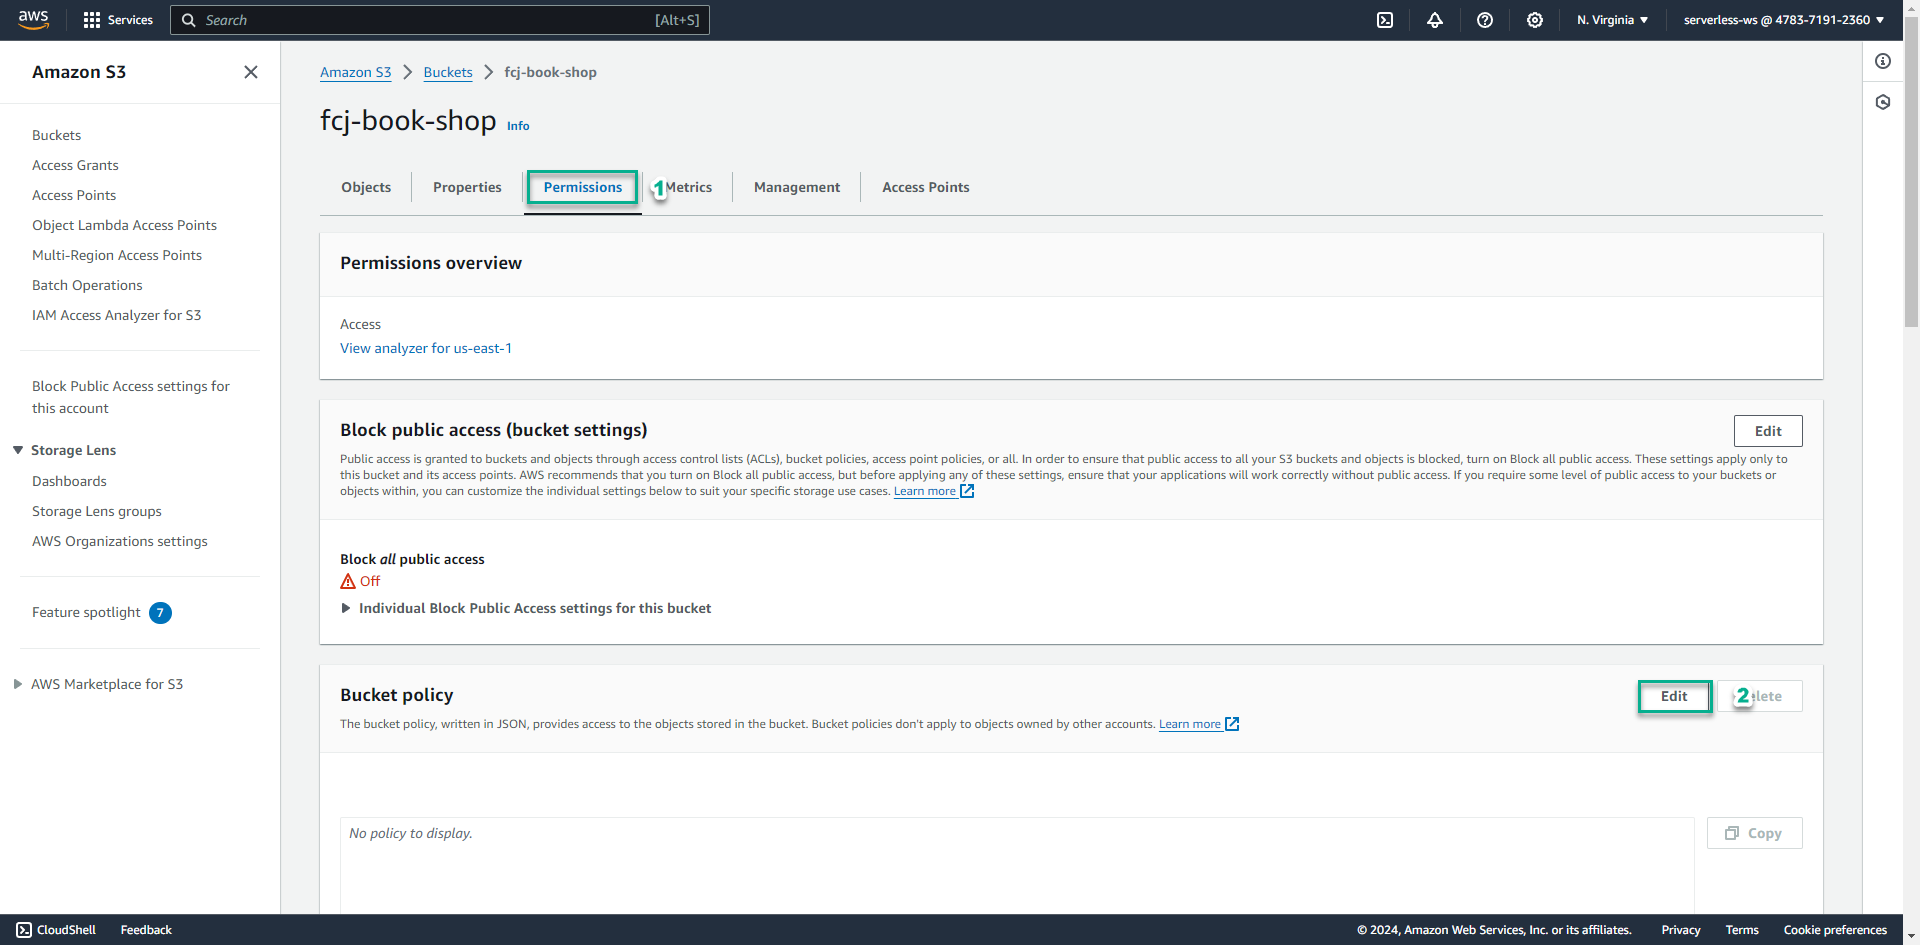
- Click Edit of Bucket policy pattern
-
Copy the below code block to Policy
{ "Version": "2012-10-17", "Statement": [ { "Sid": "PublicReadGetObject", "Effect": "Allow", "Principal": "*", "Action": "s3:GetObject", "Resource": "arn:aws:s3:::fcj-book-shop/*" } ] }- Click Save changes
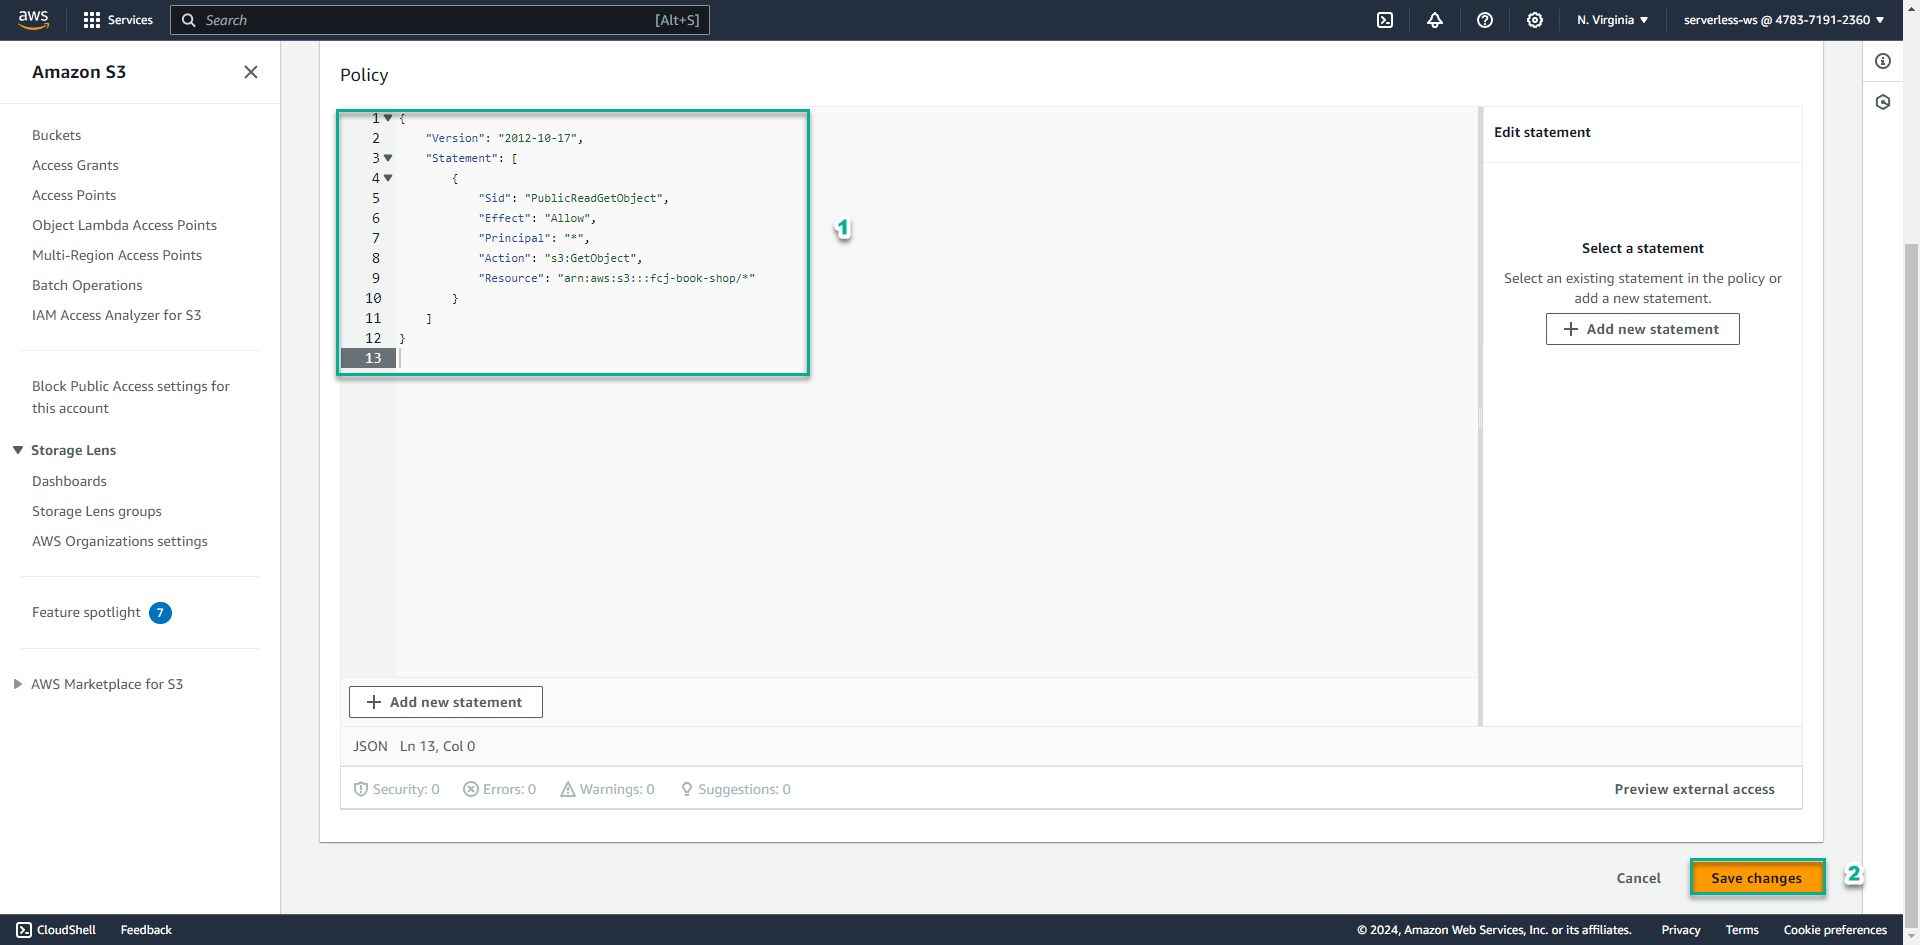
- Click Save changes
-
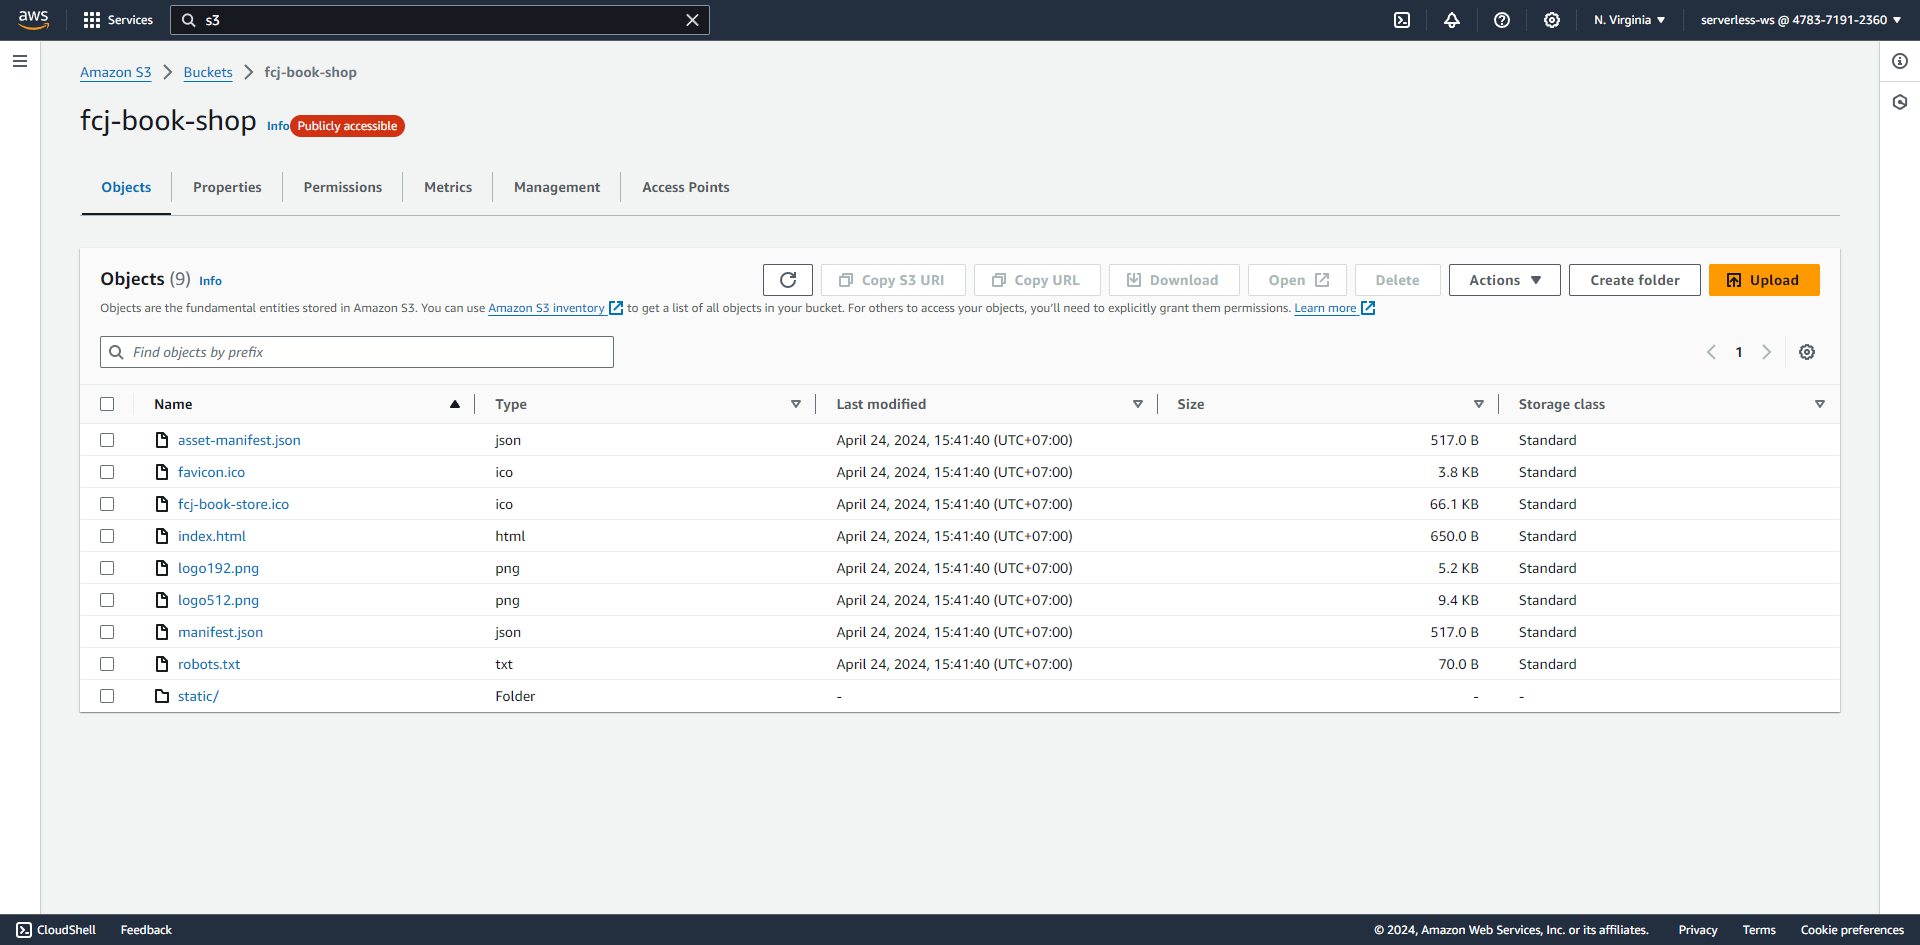
Download fcj-serverless-frontend code to device
- Open command-line/terminal in the folder where you want to save the source code
- Copy the below commands
git clone https://github.com/AWS-First-Cloud-Journey/FCJ-Serverless-Workshop.git
cd FCJ-Serverless-Workshop
npm install --force
yarn build
-
We have finished building the front-end. Next execute the following command to upload the build folder to S3
aws s3 cp build s3://fcj-book-shop --recursive
If your upload fails, configure the access key ID, secret access key, aws region and output format with aws configure command
- Paste the web link you take notes into your web browser
Your application currently has no data returned. To get data from DynamoDB, go to the next section.